


 24/7 Emergency Service
Mold Remediation Timeline: How Long Will It Take to Remove Mold From My Home?
6/10/2024 (Permalink)
 Mold Remediation Timeline: How Long Will It Take to Remove Mold From My Home?
Imagine discovering mold in your home, a silent intruder growing unnoticed in the dark corners of your living space. Like a persistent weed, mold can spread quickly if left unchecked, posing potential health risks and structural damage.
But fear not, for the process of mold remediation is akin to a skilled gardener removing weeds from a garden bed, restoring it to its former glory.
In this discussion, we will explore the various stages of mold remediation, from the initial assessment to the post-remediation verification, and reveal the factors that influence the timeline.
So, grab your gardening gloves, and let's uncover the secrets of mold removal.
During the initial assessment, you'll need to thoroughly examine the affected areas for any signs of mold growth. It's important to identify the moisture source that's allowing mold to thrive. By pinpointing the root cause, you can prevent future mold growth and ensure a mold-free environment for you and your loved ones.
When conducting the assessment, pay close attention to areas that are prone to moisture, such as bathrooms, kitchens, and basements. Look for any visible mold growth, which may appear as black or green spots on walls, ceilings, or other surfaces. Additionally, be mindful of any musty or earthy odors, as they could indicate the presence of hidden mold.
Remember, mold can pose serious health risks, especially to individuals with allergies or respiratory conditions. Exposure to mold spores can trigger symptoms such as coughing, sneezing, and wheezing. In severe cases, it can lead to asthma attacks or other respiratory infections. Therefore, it's crucial to address mold growth promptly and effectively.
If you discover mold during the initial assessment, it's essential to take immediate action. Start by addressing the underlying moisture issue to eliminate the mold's source of nourishment. This may involve fixing leaks, improving ventilation, or reducing humidity levels. Once the moisture problem is resolved, you can proceed with the mold remediation process.
To effectively address the mold growth identified during the initial assessment, the next step is to implement containment measures and air filtration. This is crucial in preventing the spread of mold spores and ensuring the safety of your home and family.
Here are three important aspects of containment and air filtration that you should be aware of:
Containment Techniques: To prevent mold spores from spreading to unaffected areas of your home, containment measures are put in place. This typically involves creating a physical barrier using plastic sheeting and tape to isolate the affected area. The containment area is then kept under negative air pressure to ensure that any mold spores released during remediation are contained within the designated area.
HEPA Filters: High-Efficiency Particulate Air (HEPA) filters are an essential part of the remediation process. These filters are designed to capture tiny particles, including mold spores, from the air. HEPA filters are used in air scrubbers and vacuums to remove airborne mold particles and maintain clean air quality during the remediation process.
Air Filtration: Along with containment and the use of HEPA filters, air filtration is an important step in removing mold spores from the air. This is achieved through the use of air purifiers equipped with HEPA filters, which continuously circulate and filter the air in the affected area. This helps to improve the air quality and reduce the risk of mold spores spreading to other parts of your home.
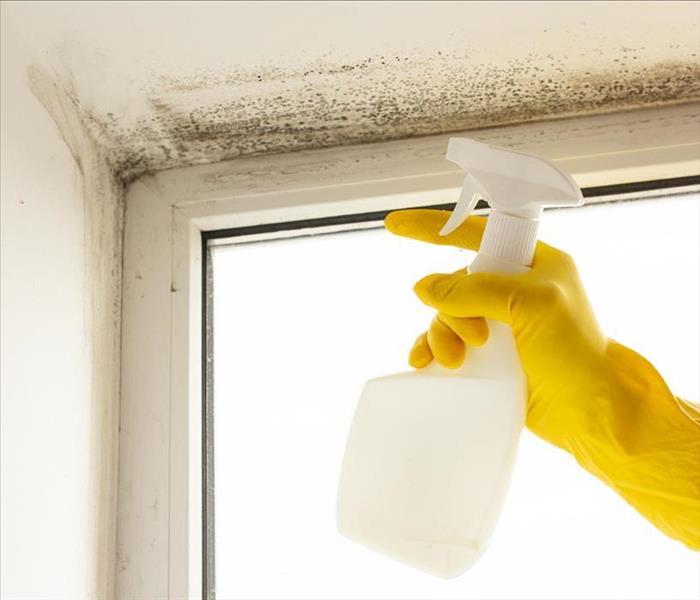
Start by thoroughly cleaning the affected area to remove any visible mold growth. Mold removal and cleaning are essential steps in the mold remediation process to ensure the safety and well-being of your home and family. Effective cleaning techniques won't only eliminate existing mold but also prevent future mold growth.
To begin, gather the necessary supplies such as gloves, goggles, a mask, and a brush or sponge. These items will protect you from potential health risks and allow you to properly clean the affected area. Before you start cleaning, make sure to seal off the area to prevent the spread of mold spores to other parts of your home.
When cleaning, use a solution of water and detergent or a specialized mold cleaner. Scrub the affected surfaces thoroughly, ensuring that you reach all the nooks and crannies where mold might be hiding. Pay close attention to areas that are prone to moisture, such as bathrooms, kitchens, and basements.
After cleaning, it's crucial to dry the area completely. Mold thrives in damp environments, so ensuring that all moisture is eliminated will help prevent mold from returning. Use fans or dehumidifiers to speed up the drying process and ensure that the area is well-ventilated.
In addition to cleaning the affected area, take steps to prevent future mold growth. Address any underlying moisture issues, such as leaks or high humidity levels. Repairing these issues will create an environment that's less conducive to mold growth.
Regularly inspect your home for signs of mold and address any issues promptly. By following these mold prevention and effective cleaning techniques, you can maintain a mold-free and healthy living environment for you and your family.
Begin by assessing the extent of the damage and identifying any structural repairs that need to be addressed for effective mold remediation. Structural repairs are an important aspect of the mold remediation process as they ensure the long-term stability and safety of your home.
Here are three key considerations for structural repairs during the mold remediation process:
Identify and repair water damage: Mold often thrives in areas with excess moisture. Therefore, it's crucial to identify and address any underlying water damage that may have caused the mold growth. This could involve fixing leaky pipes, repairing damaged roofs, or improving drainage systems around your home.
Strengthen weakened structures: Mold can weaken the structural integrity of your home by compromising building materials such as wood, drywall, or insulation. It's important to assess and repair any weakened structures to prevent further damage and ensure the safety of your home. This may involve replacing damaged materials, reinforcing structural components, or installing additional supports.
Restore affected areas: Once the mold has been removed and the structural repairs are complete, it's essential to restore the affected areas to their pre-mold condition. This may include repainting walls, replacing flooring, or reinstalling fixtures. Proper restoration not only enhances the aesthetics of your home but also helps to prevent future mold growth by creating a clean and dry environment.
Remember that structural repairs are an integral part of the mold remediation process. It's crucial to address any underlying issues and restore your home to its original condition to ensure a safe and healthy living environment. If you're unsure about the extent of the repairs needed, it's always advisable to consult with a professional in home renovation and mold remediation to guide you through the process.
Once the mold remediation process is complete, it's important to conduct post-remediation verification to ensure that all mold has been effectively removed and the affected areas are safe for occupancy. This step is crucial in providing you with peace of mind and reassurance that your home is now free from mold contamination.
Post-remediation verification involves two key components: post-remediation testing and clearance inspection.
Post-remediation testing involves taking air and surface samples from the treated areas to determine if there are any remaining mold spores present. These samples are then analyzed by a certified laboratory to provide accurate results.
Clearance inspection, on the other hand, involves a visual examination of the treated areas to ensure that all visible signs of mold growth have been eliminated.
The purpose of post-remediation testing is to confirm that the mold removal process was successful and that the air quality in your home meets acceptable standards. It helps to identify any potential hidden mold sources that may have been missed during the remediation process.
Clearance inspection, on the other hand, ensures that the treated areas are visually clean and free from any mold growth.
Review
So, there you have it! Mold remediation can be a lengthy process, but it's worth it to ensure a safe and healthy home.
Remember, Rome wasn't built in a day, and neither is a mold-free house! But with the right team and a little patience, you can say goodbye to mold and hello to peace of mind.
So don't let mold drive you up the wall; take action and let the experts handle it!